
How to Install Standing Seam Metal Roofing
A Step-by-Step Guide For Standing Seam Installation with Video Walkthroughs
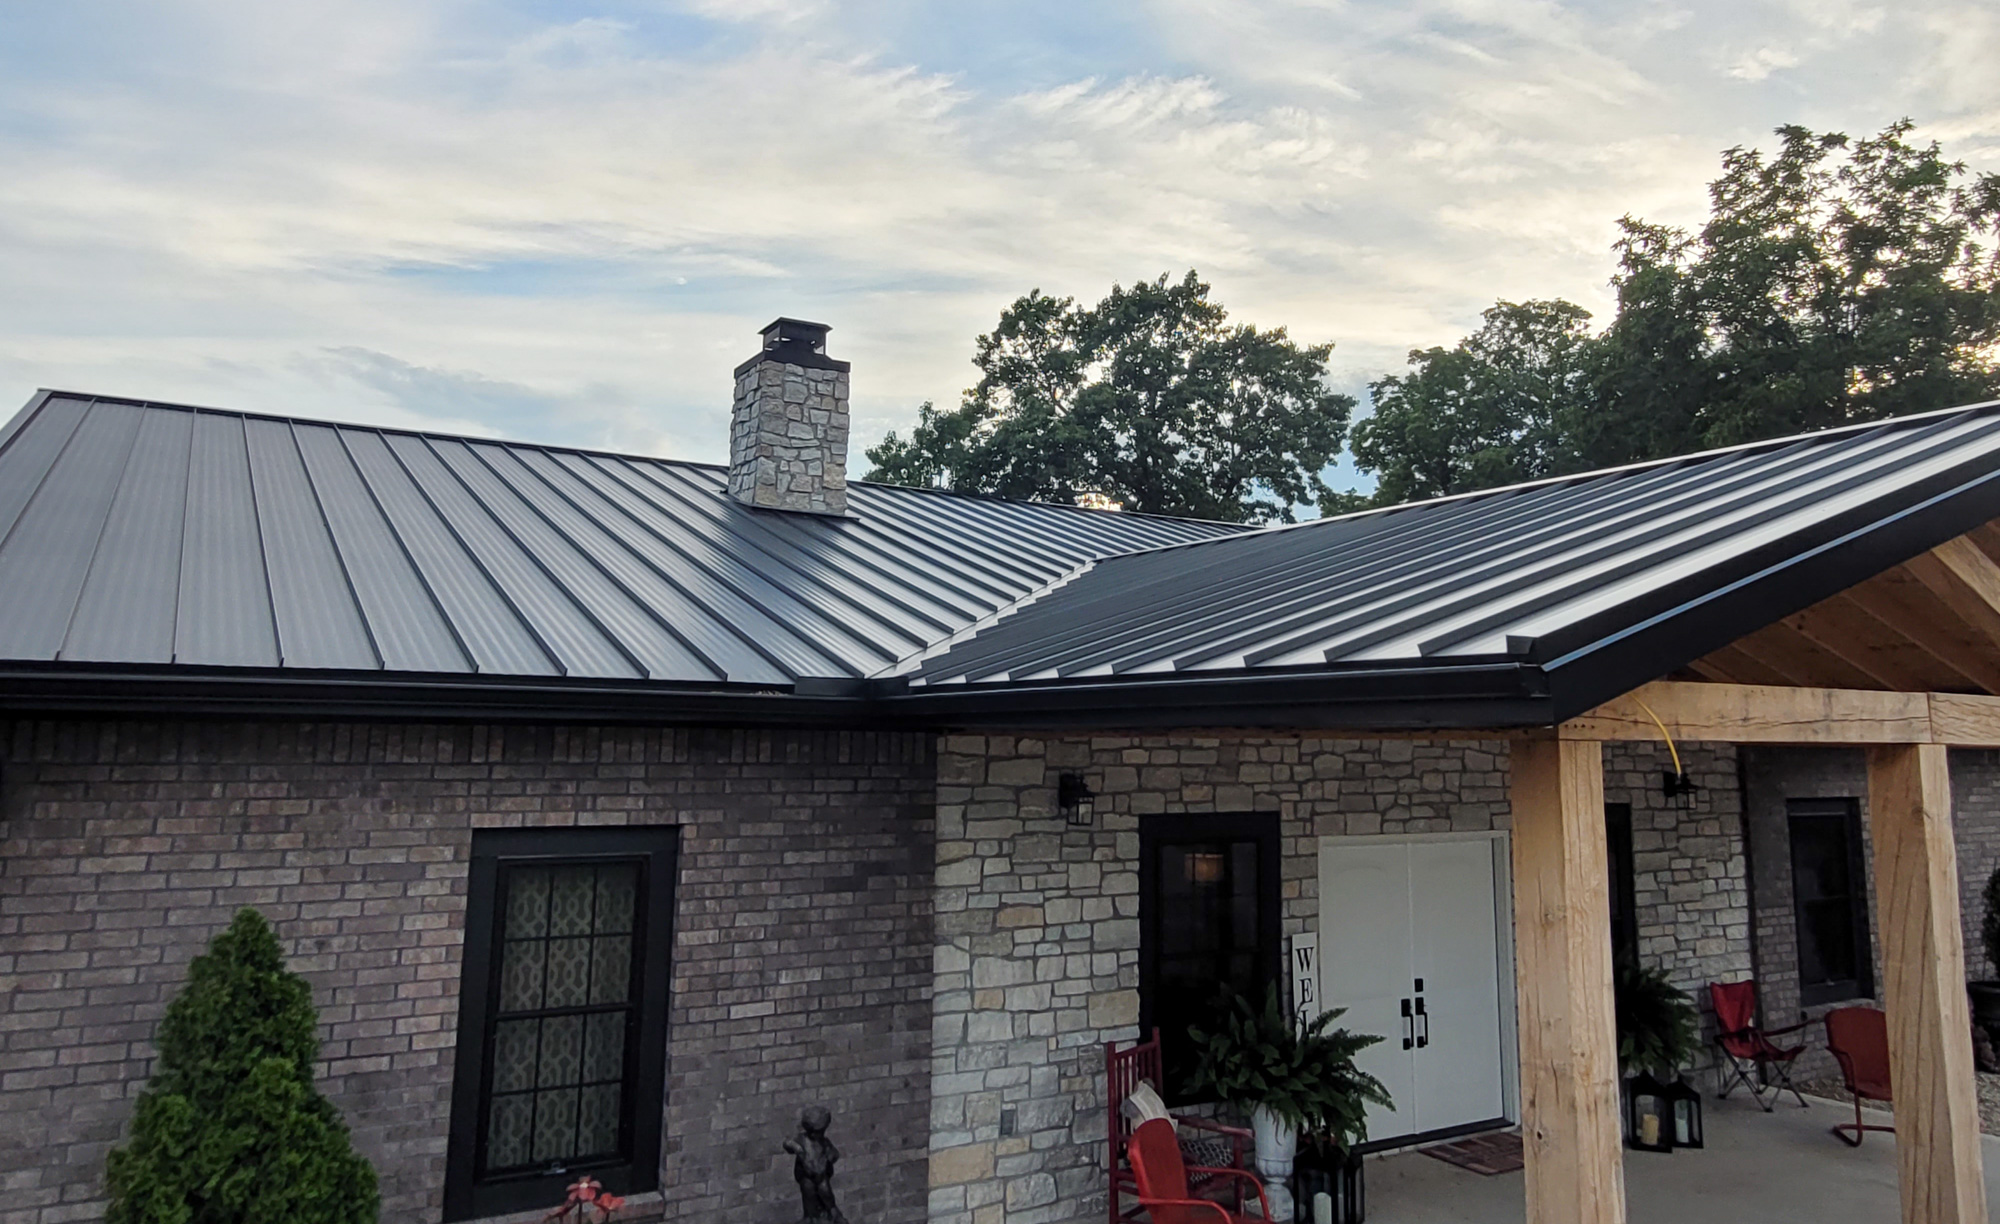
Standing seam metal is a favorite roofing option for both homeowners and contractors. With no exposed fasteners and a sleek, modern look, it offers superior durability plus a higher class aesthetic than many other roofing systems.
As a provider of custom standing seam metal panels in Arkansas and throughout the Midwest, we offer a wide variety of color options plus all the tools, trim, and fasteners you need to install standing seam, whether you’re a homeowner or a contractor.
In this guide, we’ll walk through all the different components of prepping and installing a standing seam metal roof, with videos from RR Buildings, an experienced contractor that uses standing seam metal that is very similar to ours and is very detailed in his installation methods.
Table of Contents
- What Are the Benefits of a Standing Seam Roof?
- Tools and Materials for Standing Seam Roof Installing
- How to Prepare Your Roof for Standing Seam Metal
- Basic Installation of Standing Seam Panels on Flat Roof Sections
- Standing Seam Installation on Hips and Valleys
- Hip Cap and Wall Trim Installation
- Rake Trim Installation on Standing Seam Roof
- Ridge Cap Installation on Standing Seam Roof
- Maintenance Tips for A Standing Seam Roof
What Are the Benefits of a Standing Seam Roof?
Standing seam metal is an interlocking, no-exposed fastener, metal panel system. The raised seams lock together, creating a waterproof seal that covers the screws, ensuring a longer lifespan and lower maintenance than other traditional metal or shingle roofs.
Key Benefits of Standing Seam
- No exposed fasteners
- Less chance of leaks
- Sleak, clean appearance
- Excellent wind and weather resistance
- Increased property value

Tools and Materials for Standing Seam Roof Installing
Tools Needed for Standing Seam Installation
- Quality Metal snips
- Drill and driver
- Cleat benders
- Rivet gun (manual or power)
- Tape measure, chalk line, level
- Safety harness & roof jacks
Materials Needed for Standing Seam Roof Installation
- Underlayment
- Starter/drip edge trim
- Standing seam panels (cut to length)
- Hip/valley flashing, ridge cap, rake trim, Z-bar, cleat, vented closure foam, sealants
How to Prepare Your Roof for Standing Seam Metal
A well-prepared roof deck is critical to your standing seam roof installation. Here’s a checklist to go over before you begin installing your standing seam panels.
- Inspect the roof deck and repair any areas that are compromised. A smooth, sturdy surface is very important for a quality standing seam roof.
- Install your underlayment and ice shield, starting at the bottom of the roof so the overlap ensures proper moisture and water runoff.
- Plan for panel layout and chalk reference lines for keeping your panel installation square with the roof.
For more tips and guidance on how to prepare the roof, watch the video below.
Basic Installation of Standing Seam Panels on Flat Roof Sections
This video covers the basics of a standing seam metal roof install on a flat roof section, including prepping the corners, laying drip edge, and installing the panels.
Here’s a simple step by step breakdown for a basic flat roof standing seam metal installation:
- Install drip edge along eaves and rake trim on gable end
- Measure for first piece and snap guide line to ensure it is square with the eave.
- Install first panel and fasten with screws on screw flange.
- Install additional panels, interlocking with the previous panel and ensuring hemmed bottom hooks over drip edge.
- Work from one end and move across roof, measuring every few panels to ensure it stays square with the eave. If adjustments need to be made, push or pull the top or bottom before screwing to adjust in the direction needed.
Standing Seam Installation on Hips and Valleys
This video shows how to install standing seam metal on the more complex roof areas with hips and valleys.
For hip areas, you simply cut the end of metal panels at the angle of the hip peak and continue to install panels to the end. On the 2nd side, it’s recommended to start at the top (long end) and line up the ribs with the other side to keep everything symmetrical as you work your way down. Installing the hip cap trim will be covered in the video and section below.
Valley areas are more complex and require more prep work before installing the panels. Here’s a basic breakdown of the process to install standing seam panels in a valley.
- Lay down underlayment along valley, ensuring the top side runs up the wall and overlaps.
- Install valley trim, starting with bottom piece, if multiple pieces are required. Overlap pieces at least 6 inches.
- Mark a line 3″ up from the valley center along both sides for the metal panel edge.
- Apply double-beaded butyl tape along the edge mark on both sides of the valley trim to help ensure a watertight seal.
- Measure valley angle and cut panels to length.
- Install panels, starting from the long end and working up into the valley.
Hip Cap and Wall Trim Installation
This video shows the process of installing the hip cap and wall trim on a standing seam metal roof.
For the wall trim installation:
- Mark edge for z-trim and apply butyl tape
- Cut and install z-trim, screwing into the butyl tape strip to ensure a quality seal
- Install wall flashing, overlapping trim pieces at least 6 inches.
For the hip cap installation:
- Mark line along both sides of ridge for the edge of the trim and install butyl tape
- Cut and install z-trim/closure strips along the line
- Starting at the bottom, slide ridge cap trim over closures and up to the top of the hip.
- Overlap pieces at least 6″
Rake Trim Installation on Standing Seam Roof
This video provides detailed instructions for installing rake trim with no exposed fasteners. Below are the basic steps for installing the rake trim.
- Install rake cleat on fascia side. Snap chalk lines to keep it straight.
- Snap line for rake trim edge on roof and lay down butyl tape for z-trim install
- Install z-trim on roof side
- Prep and install rake trim, starting with bottom pieces.
- Ensure each piece is overlapped a few inches and close hems with rivets
Ridge Cap Installation on Standing Seam Roof
One of the final steps of a standing seam roof install is the ridge cap. This video above shows how to install a vented ridge cap on a standing seam roof.
- Snap line for ridge cap edge on both sides of the ridge
- Install clips with double beaded butyl tape on bottom to ensure proper seal when screwed.
- Apply foam strip through clips
- Install ridge, using rivets and rivet gun to fasten to the clips.
- Overlap each trim piece at least 6″ and caulk on overlap to seal
- For end pieces, add 1″ extra length and bend down around rake trim
Maintenance Tips for A Standing Seam Roof
Once your standing seam metal roof is installed, there is very little maintenance required. Having no exposed fasteners helps ensure your roof should stay leak free for many years to come.
Here a few simple tips to ensure your roof is well-maintained and no issues develop.
- Inspect annually for sealant wear or any damaged trim.
- Keep valleys and gutters clear of debris.
- Check for any loose clips or buckling panels after major rain, hail, or wind storms.
- Re-seal any flashing areas as needed over time.
Standing seam metal roofing should provide a lifetime of protection for your home when it is properly installed. By following these best practices as shown in this article, you should have a high quality roof that not only enhance the value of your home, but also enhances the visual appeal.
Have more questions about your project or need metal for your standing seam roof? Get in contact with us or come by our metal shop and showroom in Northwest Arkansas.
Signature Steel is your local source for custom-cut metal roofing panels, tools, and support. Serving Northwest Arkansas and beyond.